
Backup Your Security DVR on a Disc
This Takes Just A Minute
Let’s suppose you have captured something shocking, or cool, or must-see and you need to save it and have other see it as well.  Then DVD recording may work for your security camera evidence. Wonder how to Transfer Security Footage on DVD when it has no DVD tray built in? Transplanting security camera events to DVD let’s others share in what you have. It’s an easy way to bring video alone without disconnecting and without worry about your expensive DVR.
Get You DVR, and DR Together at Last
This guide is intended to be an overview of the processes and not a detailed procedure. The art of recording one media to another is dependent on the equipment employed, the data being transferred, and the skill level of the user.
The very first thing you need to do is back up your HDD data to either a cloud storage or thumb drive just as a precaution before you begin. It will be less painful if a drive is erased by accident and there is a copy beside you on the table. This method we will cover is cuing and recording . It involves using the DVR as the source, and DVD recorder as the destination. Syncing up your DVR to the desired event is the first thing to do. When its time to
On Your Mark, Get Set, Play
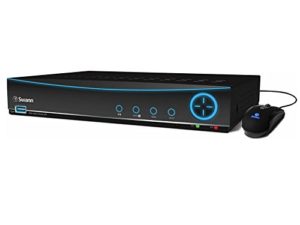
Connect your security DVR or NVR to the input of your DVD recorder. You may choose to record in VCD format or DVD for a better resolution. DVR’s use the MPEG-2 format for video files. This is a benefit as it puts it into a usable format straight from the security camera. Also DVD recorders can recognize this as well.
DVR’s can record with very high pixel count cameras and as such can have very large file sizes. This is a reminder that DVD discs can only hold and average of 4.7 GBs of data.
Get Your DVR Output To RCA

You Might Need RCA
Most of today’s DVRs and NVRs don’t have red, white and yellow RCA ports like a VCR might have done a few years past. Instead many DVR boxes use high end video connectors rated to meet a set of requirements upheld by the military and radio standards. Its ability to repel high frequency interference, and impedance matching composition make it ideal for video transmission. BNC or the Bayonet Neill–Concelman, your choice, small quick connect/disconnect fitting with a sharp center signal pin in the middle for good surface contact from conductor to conductor. They are self locking twist style connectors with a center core and pin for video transmission and a braided wrap around silicon insulation. They do a good job of keeping out interference from high EMF signals. The difficulty lies in the connecting of a security DVR with a DVD recorder that accepts RCA type jacks.
There is a BNC solution!
BNC to RCA cables get you into the right style connector to mate up both units. 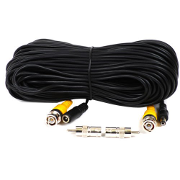 There are also adapters that will fit into the BNC of an existing cable and convert it to RCA. This step may be necessary if your DVR does not have a pre installed RCA video output port.
Steps to Record onto DVD
This can vary depending on the model of DVD recorder you use. They have a similar UI(user interface) layout. Always check your manual for complete details. Follow the manufacturers manual as to the procedure to record onto disc from auxiliary input or an external device. Follow the steps to finalize and complete the discs recording.
Types of DVDs to Use
Differences in blank DVDs
- DVD+R : Can be used once and that’s it. No re-writing even before finalization. Good for keep and store movies or data that you don’t mess with much.
- DVD-R : The same goes for -R as the +R version. Its a once and done disc. Average size is 4.7GB of capacity.
- DVD +RW : This is the first of the re-writable styles. Its named with the plus simply to compete with the – brand and there technically is no real difference. It can be written on more times than you can count. Not great for long term keep and forget media but it is an option for creating a DVD disc and will work just fine.
- DVD -RW : Again, there is technically no real difference between -RW and +RW. Either are suitable as a disc for lay down security camera recordings. The average size is 4.7GB so it won’t hold 24 hours of footage. Keep that limit in mind when making a DVD of you HD camera videos.
- DVD -DL : The DL stands for Dual Layer. It uses two slices of information sandwiched together to achieve double data capacity with the same surface area. Nifty eh?
Activate Your DVD Recorder
Brands such as Phillips, Sony, Magnavox and other top manufacturers have easy to use and reliable DVD recording units. To record onto a Disc with your DVD recorder, follow the instructions that came with them for best results. Here is an overview of steps involved in the process. It will be necessary to declare which input you are getting your video from and what record mode you are using. SL, SLP, EP, HIGH and some are specific to your player.
- Step1. Insert a record able disc into DVD recorder.
- Step2. Select the appropriate external input channel (L1,L2,Aux1,Aux2 ect…).
- Step3. Press ‘Record’ mode repeatedly to select a recording mode.
- Step4. Press ‘Record’ on the unit to start recording.
- Step5. Start playback on the external device to record from. In this case it will be the DVR. So begin playing the event on the DVR you wish to record.
- Step6. Press ‘Stop’ to stop the recording when finished.
- Step7. Finalize the recorded content for playback on other non-recorder machines.
Experiment and You Can Do IT
Video Can Transfer
Technology gets us into all kinds of stuck points. Slow loading, no loading, fires, blank screens and dead conditions. It may take a bit of experimentation to achieve your goals for file transfer. Keep things backed up as best you can for goodness sake. Take patients and thanks for reading. Visit our home page for more security systems at the Lowest Online Prices.